Wednesday, June 8, 2011

Solved Mysteries of Dressmaking by Vanessa Petey

Holla!

It's been amazing not being in school anymore. I've had time to spend on small details of my commissions and have started thinking about a lot of new endeavours regarding Petey and where we should pick up after that horrifying 6 month hiatus. I watched Coco Avant Chanel today to try and get some inspiration, and I'm feeling pretty good about the whole thing.

I recently posted a bunch of photographs of the progression of a prom dress I'm working on on
Facebook for interested parties to see. I got a lot of positive responses because I have fantastic friends, but truly, this dress has gone from being something I had to rush through because I
was i
n school and short on time - to one of the best pieces I've ever made and something I'm really proud of (and hallelujah if it fits...)
One of my friends, a fantastic woman I met when I worked at Fabricland years ago, and also a wonderful seamstress and artist herself, comments regularly on my work. Although every comment I
ever get on anything are so greatly appreciated, it's different when the comment is coming from
someone who knows the trade and could see the flaws that the untrained eye would likely miss. I
thanked her on Facebook, with a little wall post, and added that I continued to use her zipper trick on all zippers I'm installing, with the exception of the invisible zipper. Her response was lovely and on the end she
attached that even she was perplexed by the installation of an invisible zipper.
First I just was going to message her with a step by step guide to installing one from my own experience, but then I thought - WAIT. I have a blog for this kind of thing.
So here we are.

How to Install an Invisible
Zipper - By Vanessa Petey
1) from the hem of the fabric up to the zipper notch, stitch. backstitch.
2) open the zipper and match the top closure of the zipper to the top edge of the fabric. the outside edge of the zipper should be level with the edge of the fabric to the notch with the teeth of the zipper facing inward.
3) baste stitch near the edge of the zipper with regular sewing machine foot. sew the entire length of the zipper down to just past the zipper notch where the two fabrics meet.
-when the foot reaches the slider of the zipper, leave the needle down in the machine and raise the foot. slide the zipper closed and continue
4) do the same to the other side, making sure to match the tops of the zipper sides.
5) switch
to a zipper foot on the machine (an invisible zipper foot is good too... and some seamstresses will swear they never use anything else for an invisible
zipper, but I much prefer my method, so take your pick.)
6) press apart the teeth from the tape of the zipper and lower the zipper foot as close as possible to the teeth. sew down from the top repeating the method of moving the slider with the machine stopped and the needle down.
7) when the machine reaches the bottom of the zipper, simply veer the stitch off of the edge of the fabric leaving a tail.
8) repeat for the other side of the zipper
Done!

I actually find it more simple than any other sort of zipper in dresses, to be honest.

So anyways that's what i thought I'd explain today, so if you're a sewer, you might have found it interesting... if not... well... see ya next time with something less painfully boring.

LOVE!

- V

Solved Mysteries of Dressmaking and Caffienated Beverages

Holla!

It's been amazing not being in school anymore. I've had time to spend on small details of my commissions and have started thinking about a lot of new endeavours regarding Petey and where we should pick up after that horrifying 6 month hiatus. I watched Coco Avant Chanel today to try and get some inspiration, and I'm feeling pretty good about the whole thing.

I recently posted a bunch of photographs of the progression of a prom dress I'm working on on
Facebook for interested parties to see. I got a lot of positive responses because I have fantastic friends, but truly, this dress has gone from being something I had to rush through because I
was i
n school and short on time - to one of the best pieces I've ever made and something I'm really proud of (and hallelujah if it fits...)
One of my friends, a fantastic woman I met when I worked at Fabricland years ago, and also a wonderful seamstress and artist herself, comments regularly on my work. Although every comment I
ever get on anything are so greatly appreciated, it's different when the comment is coming from
someone who knows the trade and could see the flaws that the untrained eye would likely miss. I
thanked her on Facebook, with a little wall post, and added that I continued to use her zipper trick on all zippers I'm installing, with the exception of the invisible zipper. Her response was lovely and on the end she
attached that even she was perplexed by the installation of an invisible zipper.
First I just was going to message her with a step by step guide to installing one from my own experience, but then I thought - WAIT. I have a blog for this kind of thing.
So here we are.

How to Install an Invisible
Zipper - By Vanessa Petey
1) from the hem of the fabric up to the zipper notch, stitch. backstitch.
2) open the zipper and match the top closure of the zipper to the top edge of the fabric. the outside edge of the zipper should be level with the edge of the fabric to the notch with the teeth of the zipper facing inward.
3) baste stitch near the edge of the zipper with regular sewing machine foot. sew the entire length of the zipper down to just past the zipper notch where the two fabrics meet.
-when the foot reaches the slider of the zipper, leave the needle down in the machine and raise the foot. slide the zipper closed and continue
4) do the same to the other side, making sure to match the tops of the zipper sides.
5) switch
to a zipper foot on the machine (an invisible zipper foot is good too... and some seamstresses will swear they never use anything else for an invisible
zipper, but I much prefer my method, so take your pick.)
6) press apart the teeth from the tape of the zipper and lower the zipper foot as close as possible to the teeth. sew down from the top repeating the method of moving the slider with the machine stopped and the needle down.
7) when the machine reaches the bottom of the zipper, simply veer the stitch off of the edge of the fabric leaving a tail.
8) repeat for the other side of the zipper
Done!

I actually find it more simple than any other sort of zipper in dresses, to be honest.

So anyways that's what i thought I'd explain today, so if you're a sewer, you might have found it interesting... if not... well... see ya next time with something less painfully boring.

LOVE!

- V

Thursday, June 2, 2011

Confessions of a Design School Drop-Out

“I don’t design clothes, I design dreams,” says Ralph Lauren, millionaire fashion business mogul and founder of the design label by the same name. Ralph Lauren started from nothing. He was the son of Jewish immigrants, growing up in the Bronx in New York and the only thing he knew he wanted to be when he grew up was a millionaire. In the 70s he enrolled in a local college for business with a specific interest in fashion design and after 2 years dropped out of school. As a result of his own lines, Ralph Lauren Polo and Club Monaco as well as his countless investments in a long list of other American labels, the man is now worth $8.5 billion.

I came to a decision after much thought

and consideration to leave design school, yesterday while I was sitting in class. The truth is, I lost interest in the program some time ago and have since been struggling to keep my attention on anything school related for any length of time. I knew it was time to leave. For months now my physical health, social obligations and overall creativity have

suffered in a seemingly irreparable way, which was something I could handle, if I felt that I truly needed the program or that it would benefit me to stay in it.

The straw that broke the camel’s back for me was when I realized how much I missed working on Petey the Troll. Meaghan and I had serious plans when we arrived in Toronto this past January – none of which have even begun to come to fruition. For me this is a problem that I can’t not fix.

So now I have a few directions I can take and things I can do in order to more directly achieve the goals I wanted to achieve 5 months ago. Over the next few months I’m going to be moving very quickly, releasing new info and items and photographs all the time.

My next project is a sea foam green prom dress for a lovely young girl by the name of Thyra. Tomorrow I’ll post a few pictures of the progression of a dress such as this (it’s chiffon!!) with

some comments on why I chose to use certain techniques or methods.
Oh ps. my fabulous friends and I are having a Mad Men costume party and I'm working on a few vintage dresses that i'm so friggen excited about I can't contain myself. There will be photos soon.

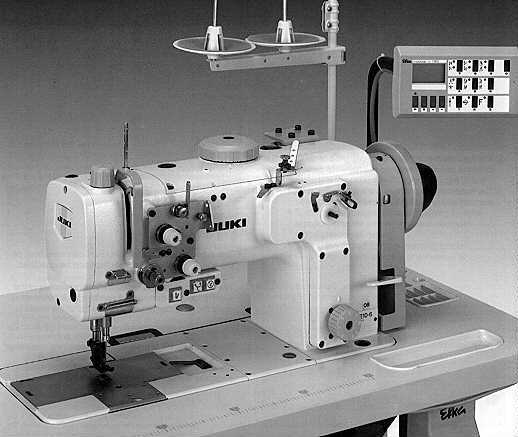
And o m g! We'll be getting an industrial sewing machine for our apartment really soon so production is about to go through the roof. You know what that means gurrrrls ;

Until next time, I’m Vanessa Petey, and I’m glad to be back.